Monday, July 26, 2010
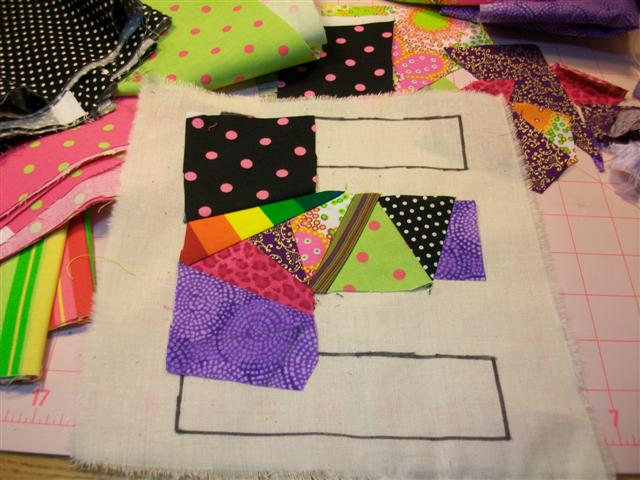
Monogram Tote Bag: E
Sunday, July 25, 2010
Monogram Tote Bag: A
The dangle for the handle is a fancy black yarn that has shimmer too!
Saturday, July 24, 2010
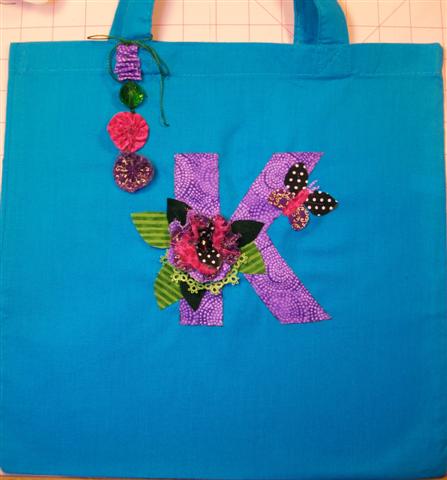
Monogram Tote Bag: K
For the dangle from the handle I created a faux fob with a bit of fabric I just running stitched along and gathered, a green bead, a yo-yo and a circular flower.
Friday, July 23, 2010
Monogram Tote Bag: F
This one is for Fallon and she loves purple so I used the dark purple fabric with the gold swirl print for the "F". Then I took a fat quarter fabric that had some sweet prints of flowers on it and cut out the pretty purple flower. I also used a piece of lace from my bits'n'pieces stash. I sewed around all the edges using straight stitch setting and invisible thread! Don't let that fool you all the curves I had to go around on the flower...tons of work!
The dangle from the strap is some eyelash yarn, ric-rack and white lace.
Thursday, July 22, 2010
Monogram Tote Bag: S
Stephanie LOVED it!
I just appliqued the black polka-dot fabric "S" with a zig-zag stitch with the raw edge then attached a couple of lace applique leaves and made a matching shabby-flower and attached it!
What I do for the monograms is search the fonts in Word until I find one that is simple and print it cut it out and then trace it onto fabric and cut that out! Easy!
Wednesday, July 21, 2010
2010 ESD Enchanted Challenge: Fairy Treasure - Puffy Silkie
Tuesday, July 20, 2010
2010 ESD Enchanted Challenge: Fairy Treasure - Sewn Together
It's really hard to photograph this piece with all the shades of green and surfaces of fabric the camera lens just doesn't see it the same as my eyes, some things look right and then other things look wrong so as I go along I'll be trying to figure out the best way to take photos too. Accurate photos always seem to be the thorn in my side! LOL Hey at least in these photos it seems that my textures turned out pretty well, you can see the texture of the silk velvet pieces really well which I purposely wrinkled up when piecing the blocks for the yummy soft effect.
I'm trying to do as much as I can with this piece right away while I still have excitement fueling me because I know there will be times where I may get a little stuck and I want to give myself room to take my time during those moments without the deadline looming over me! LOL
2010 ESD Enchanted Challenge: Fairy Treasure - Keeping Me Company
Saturday, July 17, 2010
2010 ESD Enchanted Challenge: Fairy Treasure - Pieced Blocks
The rules stated to use half the fabrics included in the package and there were 13 pieces and I used 7 all six of the greens and the shimmery-striped fabric that the fairy silkie will sit on. It was for sure a challenge because some of the greens weren't my fave shades so I had a puzzle to mix and match all the different shades of greens. I love how it turned out with lots of texture.
I also cut out the silkie in an oval shape and I love how the leaf beads look around the edge! I need to buy another string of the leaf beads! LOL I'm also thinking of ways to add more foliage around the silkie too.
As for my little background story I think my fairy's name will be either Emerald or Peridot I can't make up my mind which, but Peridot is a more golden-green so I think it may fit better. Which do you all think her name should be?
Wednesday, July 14, 2010
2010 ESD Enchanted Challenge: Fairy Treasure
Monday, June 21, 2010
A Dress for Elizabeth! ♥
After we finished working out all the kinks of the dress we cut a piece of white lace from my stash for her to use as a wrap or like she did in the photo below tie it in the back to look like a bolero or shrug.
Voila! Two non-seamstresses but very creative gals created a pretty good looking formal if I do say so myself! LOL
Monday, June 14, 2010
Craft Room Update
Above is a photo as you walk in the door! The board on top of the little chest of drawers is padded fabric and can be ironed on! How perfect is that!
Right next to the door I have a Design Wall hanging you can see the Tree Project on it right now. It's supposed to hold blocks on it without using pins but my cream blocks are too heavy to stay up for too long, if I want it to stay up longer term I still need to pin.
Thursday, May 13, 2010
A Sweet Ballerina CQ Heart: Tutu & Flower
Her birthday party is this weekend so I'm going to try to get a vid of her when she opens the gift, she is so cute and gets so excited about all her gifts that it's fun to watch! We always say we should get her on video! LOL
Monogram Tote Bag: J
Her fave color was purple so I created a purple shabby flower to embellish her monogram. She also loved polka dots so I chose a green with white polka dot fabric for the J I thought it would compliment nicely. Then I had a piece of Hen & Chicks Tatted Edging that I had tatted and saved in my stash and since Jessica is creative herself and does crochet I thought she would enjoy some tatting, who knows she may want to learn to tat! She already wants to learn embroidery! LOL
Anyway I used purple fabrics for the shabby flower and a printed organza that had purple flowers on it. I cut out the flowers out of the print and the frayed sheerness of the organza acted like a lace element! I used a large purple bead in the center of the flower! I also made a small bud to go with the flower and it is using a small flower shape with some scraps of the organza in the center just gathered in the center.
Then on the handle I tied some strips of the organza fabric and a strip of purple fabric!
Monday, May 10, 2010
A Sweet Ballerina CQ Heart: Framed
On the back I put a pretty wrapping paper and then printed a label that reads "To Rebekah, A sweet ballerina who will always be my friend! Love, Melissa"
Saturday, April 17, 2010
Fabric & Lace Flower: Black and Silver
This flower I made for a bridal shower where the bride's colors are Silver and Black! I know she'll love it! I glued a pin-back on the back of it.
Friday, April 16, 2010
Fabric & Lace Flower
I did like she said and cut 2 larger (9 petal) blob shaped flowers, and 1 each of a medium (7 petal) and a small (5 petal) blob shaped flowers and crumpled and frayed them. (I made my small one too small so I had to re-cut it. Make each size just barely smaller than the other.) Then I added lace bits and sewed it all together added the tatting stitched it on and added the pearl thingy. Then I went around the back and gathered it like she said. But there I stopped I didn't do any gluing but I did tie some pink eyelash yarn around the pearl.
Now I'll just back it with a pin-backing and either use it as a pin or a pendant. You could use this for anything really I could even see sewing this (or a smaller version) down onto a crazy quilt.
Wednesday, April 14, 2010
Monogram Tote Bag: A
I had seen one of the blogs in my feed (Allie's in Stitches) had mentioned Broderie Perse which got me interested so I google searched about it! It's a form of applique using a printed fabric that you cut out the print and applique it onto another fabric.
Subscribe to:
Posts (Atom)