Friday, May 30, 2008

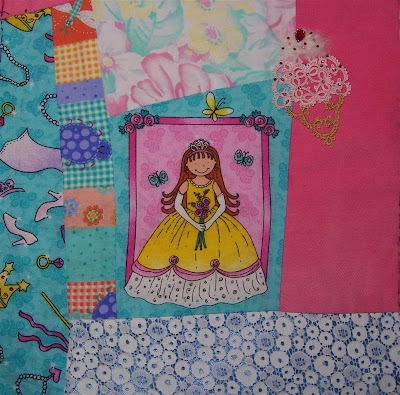
Princess Block with Ice Cream Cone

Here is another Princess Block I have for Bekah's Princess CQ! I think the cone goes so well on it, now it's ready for other embellishments, I just know Bekah will love it!
What I did was sew down the tatted Ice Cream Cone made by TattingChic, and then I added some fuzzy yarn as whipped cream topped by a beaded strawberry and sprinkles. For the strawberry I used a large Czech glass faceted red bead with a gold bead cap and a red delica bead at the tip. I used the little red delica beads also as some sprinkles as well as some pink regular sized seed beads. I didn't add any beads to the cone area because when I tried it out it took away from the ice cream part, so I left it only tatting for a nice contrast.

Thursday, May 29, 2008

Gift of Tatting from TattinChic!!!

Today I got a wonderful gift in the mail from TattingChic!
What is that you see, so elegantly peeking out from my little red bible?
Why that is my Hand Tatted treasure of Friendship made just for me by TattingChic!!!
So elegant and perfect with tiny little stitches! Also it will match all the work I'm doing on the hand bag for this little bible!
Here is both treasures that she sent me tucked lovingly in pink mulberry paper!
As you can see it will be a perfect addition to one of Bekah's Princess Blocks...just what Princess Bekah will need, a delicious lace strawberry Ice Cream Cone, on a hot day! I just know she'll love it! I'm thinking some whipped cream with a strawberry on top will be the perfect touch to this wonderful tatted cone!
Thank YOU TattingChic!!!!!!!!!!
Framing My Spring Challenge Block

Here is proof Framing doesn't have to be expensive! LOL I always check the bargain stores like Ross in their framed art section and find the prettiest frames that are just shadowed enough for a CQ block. There's no need for one of those deep shadow box frames (which are usually ugly and plain) when these have enough room, it looks like it is about half an inch deep if not three quarters of an inch deep, and it's pretty! This one only cost $11.99 but sometimes you can get an even better price. All you have to do is take it apart remove the art and add in your block (and new matting if needed)!
When I saw this frame in the store I just knew it was large enough and the perfect finish for my Spring Challenge block with matting. Sometimes you get really lucky and everything about the frame is perfect including the matting but in this case the inner matting is not big enough so I will remove that and cut new matting to fit the block.
I'm just so thrilled that my block will soon be framed!

Wednesday, May 28, 2008

First Doily Round 3 Done

Well I finally finished round 3 of my first doily! WooHoo! That last join at the end (chain to ring) was a nightmare...good thing it ain't a competition piece is all I got to say! LOL Yall probably can't see it in the photo though but it's not as pretty on the back side, but I figure...hey it's going to be on a table and the backside won't be seen!!! LOL Sometimes I think we get so caught up in perfection the fun goes right out the door, but I'm determined to not let that happen and just enjoy it...imperfections and all.
Now on to round 4! I'm on my way to completing this doily!

Sunday, May 25, 2008

Dreams of Spring RR: Cobi's Block

Well I've finished my additions to Cobi's Dreams of Spring Block! I added a few more vines to the wall using another color of 2mm silk ribbon in the ribbon stitch.
Here is an overall look at the block, please note that my work is ONLY the silk ribbon vines on the walls, the rest of the work was done by other ladies in the Round Robin. Wendy offered to work on the block as well and so I asked Cobi's permission and she agreed that it would be wonderful to have Wendy's work on her block as well! So now it will be in the hands of Wendy, who says she wants to add to the pond!

Saturday, May 24, 2008

Angel Lace: Friendship Block Finished

I've finished the block! I put in a photo without and with the flash just to show it better, it's hard to capture the true look of a block sometimes.
As you can see I've added more beads around, the lower right has dangling flowers and drops.
I've added Sweetheart roses in both 7mm and 4mm ribbon and some 4mm ribbon stitch leaves. I also added a feather stitch seam with gold lined size 15 seed beads. I took out the inner 6inch basting so that when it's framed it won't be seen and the block can be positioned just right, but I left in the outer 7 inch basting just to keep the edges in place.
I'm very happy with how this block has turned out, so elegant! Soon this will be off in the mail for TattingChic to enjoy!

***Update 28 May***Tatting Chic is so sweet when she got the block she gave a tour of the block on her blog! Click Here to see her tour!

Friday, May 23, 2008

Friendship Block

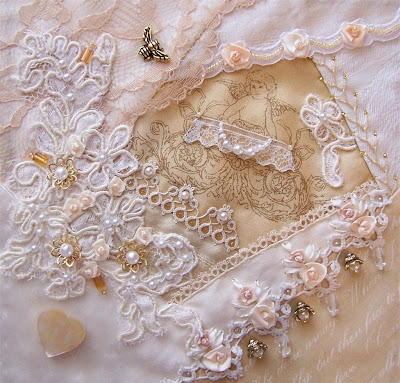
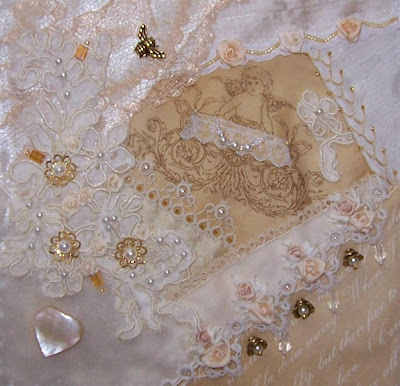
Yesterday I just could not put the block down! I hand sewed all the lace in place and then couldn't stop adding little touches! I made the banner into a little table with lace cloth and then had the angel hold a swag. I added beads and pearls, gold bead cap "flowers" with pearl centers, a shell heart, and my signature honeybee. That little bee is my favorite one out there it's so pretty without too much detail or being too cutesie.
I added some of my favorite vintage wedding lace I have, and also some more tatting. The ecru hen & chicks tatting that is in the center I tatted in size 80 thread, and the lower right corner tatting is vintage that looks like it was well loved, but I thought it looked nice with the antique feel of the block also I'll be embellishing it further.

Thursday, May 22, 2008

Friendship Inspired Block for TattingChic

What started as an idea to exchange lovingly created items became this friendship inspired block for TattingChic! When I saw the center print in my stash I just knew I had to do a block for her using it! I know she loves angels and as a child thought of tatting as the lace of angels. The tatting you see is a vintage hankie I had gotten and I thought a piece of it would be fitting. The size is 6inch but it has a 7inch outer basting line for a little leeway.
I hope you love it my friend!

Wednesday, May 21, 2008

The Start of My First Doily!

I've decided it's time for me to tat a doily! I've started several times on one to get side tracked or derailed, but this time I'm committed to finish it! As you can see in the photo I've finished the center part of This Doily Pattern. I just did rounds 1 and 2 as one motif instead of separate rounds, to me it just seemed to make more sense that way. I'm tatting it up in DMC Cebelia size 30 thread, and this center motif is just under 2 inches wide!
Also TattingChic has promised to tat the doily up with me and we started a Tat-Along at eTatters for others to join in tatting the doily at their own pace too! This should be fun and provide lots of doily eyecandy, as well as seeing the many ways each person goes about tatting the doily. If there's anyone else who wants to tat it along with us join on in!!!

Friday, May 16, 2008

Dreams of Spring RR: Cobi's Block

Here is more progress on Cobi's Dreams of Spring block. I added in more vines with the same 2mm ribbon all over the wall. I ran out of the ribbon so if I add more vines they will be different, I'm not sure if I'm going to use 4mm or another color of 2mm.

Thursday, May 15, 2008

Dreams of Spring RR: Cobi's Block

Well I started adding some vines to Cobi's Dreams of Spring block, all I did was add small 2mm silk ribbon leaves in ribbon stitch wandering about. When I think of crumbling walls and secret gardens I think of vines rambling so that's what I'm planning on doing is adding in more vines over the wall.
This is just a little further out look at the vine I added in reference to the previous work done by other ladies in the RR.

Wednesday, May 14, 2008

Gift for Stephanie

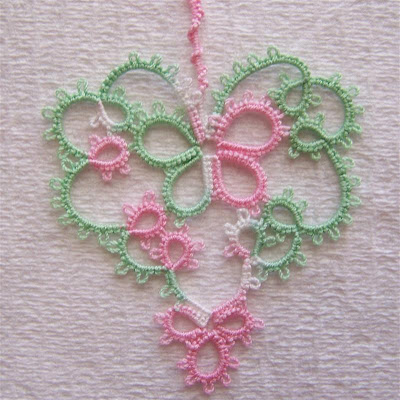
There is a birthday coming up and I wanted to do a little something for Stephanie (turning 14) so I got her some "name" items that she's always eyeballing and then tatted a bookmark using thread to match and a heart pattern. Hope she loves it!
Butterfly Heart by Irene Woo
I did a couple of tiny changes like the rings near the tip I changed a join, I also added a picot and stitches to the center clover of the tip and I think in the future I'd change the tip's chains to be shorter too to create a little different of a heart shape. For this heart to be a bookmark I just added a long chain of Josephine knots at the end. The thread used is Olympus size 40, very nice to tat with and give a clean crisp look to the tatting.

Tuesday, May 13, 2008

Mail Call!!!

I received this beautiful heart in the mail from Jill!!! Isn't it sweet!!! She remembered that I love red roses and so made a little climbing rose landscape with some pretty little flowers at the base! I don't have a project in mind yet but I do have an idea for how to applique it when I do find the right project. I'm going to put roses and vining leaves all around it to frame the lovely landscape Jill made! Thank you Jill!!!
This is the last block in the Dreams of Spring RR that I'm in, it is Cobi's block. It was hard to photograph because of the large size of the block, also Cobi mentioned that because of the size she doesn't expect it to come home finished. I'm going to have to stare at it a few days and maybe look through a few landscape embroidery books because I have absolutely NO ideas so far! LOL Good thing I have a month to work on it!

Saturday, May 10, 2008

Black & White Top Edging

I am so excited because I just finished the length of the Black Edging I needed for the Black & White Top!!! I did a quick scan right when I finished so it's not blocked or anything. Now all I need to do is wash and hand sew it into place! It took 10 repeats and is curving in the perfect way!

Friday, May 09, 2008

Tatted Initials

I was looking through my tatting books and I have a really old one not sure if it's antique but I've seen here and there that it might be. Anyway it has an alphabet so as I was looking at them (again) this time as I looked I felt that I could try again and understand how to do it. So here are my tatted initials each took one tester and then the 2nd run was just right! I had to figure out how to do them since the patterns didn't say really how and back then they didn't know techniques we do now so it made me feel really good to know I've come this far to be able to understand how tatting works enough to do it and get the look I wanted! The "A" I completely changed the pattern so it works better and goes more with the "M". I think they go perfect on the back of the CQ Bible Handbag!

Thursday, May 08, 2008

CQ Bible Handbag: Little more work

Well here is a little more work on my CQ Bible Handbag.
I added a strawberry sew down and some more stems for vines and some feather stitching on 2 seams in red to which I'll be adding beads once I finish the leaves on the vines.
I also pinned on some lace bits for the back of the bag and a little honeybee and stitched on my initials and the date in red so it blends into the fabric.

Tuesday, May 06, 2008

Tatted Heart and CQ Bible Handbag

I finally finished tatting the "Hearts Desire" pattern and decided it would look great on my current project, the CQ Bible Handbag!
I also added a bit more to the motif I'm working on. I added some metal leaves and a little metal bee charm.
I also pinned on some more lace around the block.

Trying out a new shuttle and pattern

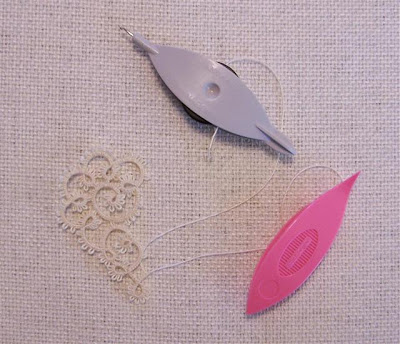
When I saw this tatted heart on TattingChic's blog, I just knew I had to tat it up! The pattern is "Hearts Desire" by Susan K Fuller. I've been seeing it tatted up quite a bit now, I guess it's just that pretty that you just are compelled to tat it! LOL
I also recently bought an Aero Shuttle to try out. I know there is an ever present debate among tatters of the Aero vs. Clover shuttles and I personally love the little Clover post style shuttles but I wanted to give the Aero a try. I totally understand why both sides either love it or hate it, I'm kinda in between. I didn't mind size and shape that was good the thing at the end gets a little in the way but that can be gotten used to. I did like the hook for times when I want the hook it was especially handy for tatting over ends and joining. On the flip side there were more than plenty a moment when I needed to unpick and the hook just wouldn't do and I had to reach for a clover shuttle to use the nice thin and pointy pick to unpick stitches. It strikes me real funny how much I rely on unpicking! For example if a picot is not the right size I usually partially unpick it to either loosen or tighten to get it more even with the rest (yes I do pull on the picot for the too small ones as well), not to mention the moments that I accidentally add to many stitches or some such! LOL The only other negative for me is when I'm closing rings since I'm used to the post shuttles I use the shuttle for tension and with a bobbin if you do that it unwinds. So I'll prob still use the Aero shuttle for projects that I'll use a hook a lot, otherwise I think my favorite little post shuttle will stay. You know what I think would be a great idea? Either adding a pick end to an Aero or a hook end to a Clover and then I'd be all set! LOL

Monday, May 05, 2008

My Sister

My little sister, Joyce, was in the area for a school choir thing so we drove 3 hours on Friday to go see her for a few hours. We went to the beach to hang out since it was such a nice day. I miss my little sister so much, but we did have fun and it was totally worth it to get to see her! AND we made plans for her to visit this summer too, so I'm excited about that.

Friday, May 02, 2008

CQ Bible Handbag

Here is a little bit of progress!
This motif idea came from the bit of lace when I was trying out different ideas. I added sweetheart roses so far and stitched in some stems and some of the leaves.
This little strawberry is going to act as a button closure, I'll attach a loop on the back side and I hope it works as planned. I made the strawberry out of a recycled girls dress that was blue cotton velveteen and had a red velveteen bow. I took the bow and cut off the corners then rounded the upper cut edge and sewed a running stitch along the top rim, stuck a large ugly recycled bead inside and cinched it up, then I added silk ribbon lazy daisy leaves and the Perle cotton stem is attaching it to the purse.

Thursday, May 01, 2008

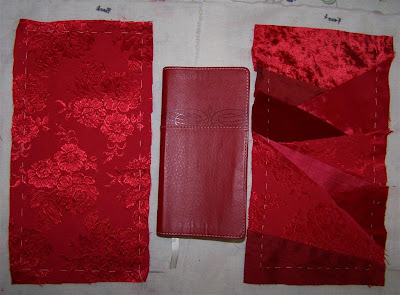
CQ Bible Handbag

These colors and fabrics are hard to photograph so I just put both photos of with and without the flash.Since we work with the Youth at church, sometimes I just want to take my little Trimline Bible and not lug around a purse so this is my solution, to make a little Bible handbag that can carry just the essentials! So far the blocks are 5x8 inches and that should be more than plenty room. I'm planning on going with a strawberry and roses theme, but we'll see how things go as I embellish.