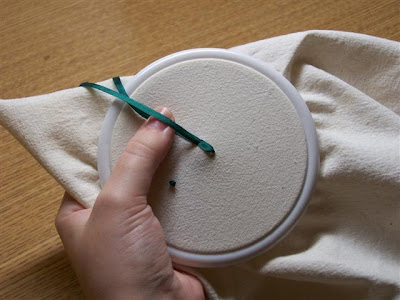
I put together this little tutorial for anyone who would like to know how I make my ribbon stitch leaves. When I first learned this stitch I had a million questions, with no one to answer them! I kept on stitching and eventually through trial and error figured out how to make some nice lush looking leaves.
Click on any of the photos to see closer.
Click on any of the photos to see closer.
.jpg) First take your ribbon to the top of the fabric. Be sure to pull the ribbon up in the direction of where the tip of the stitch will be, this helps control the ribbon to curl under and be puffy. Click here to see more on how to pull your ribbon to get the results you want.
First take your ribbon to the top of the fabric. Be sure to pull the ribbon up in the direction of where the tip of the stitch will be, this helps control the ribbon to curl under and be puffy. Click here to see more on how to pull your ribbon to get the results you want..jpg) If needed you can take your needle and on the underside slide it up and down to get your ribbon to behave how you'd like. Sometimes it just twists and this is an easy way to try and fix it.
If needed you can take your needle and on the underside slide it up and down to get your ribbon to behave how you'd like. Sometimes it just twists and this is an easy way to try and fix it..jpg) Next lay your ribbon flat in the direction of where the tip will be. Let it puff up and not be completely flat against the fabric. Hold the ribbon in place with your thumb. Take the needle and pierce at the desired length of your stitch.
Next lay your ribbon flat in the direction of where the tip will be. Let it puff up and not be completely flat against the fabric. Hold the ribbon in place with your thumb. Take the needle and pierce at the desired length of your stitch..jpg) Here is a side view of the stitch so you can see the puffiness. The puffiness is what creates the lush leaf look.
Here is a side view of the stitch so you can see the puffiness. The puffiness is what creates the lush leaf look..jpg) While holding the ribbon in place with your thumb, draw the needle and ribbon to the back of your fabric. Be sure to straighten any twists that may occur.
While holding the ribbon in place with your thumb, draw the needle and ribbon to the back of your fabric. Be sure to straighten any twists that may occur..jpg) As you can see the ribbon is being pulled back and there are no twists in the loop as it is being brought to the back. My thumb is "helping" it along, making sure it is straight.
As you can see the ribbon is being pulled back and there are no twists in the loop as it is being brought to the back. My thumb is "helping" it along, making sure it is straight..jpg) If you happen to pull it too far or it gets a little twisted just take your needle and run it under the "belly" of the stitch to try and straighten it out or wiggle it back into place.
If you happen to pull it too far or it gets a little twisted just take your needle and run it under the "belly" of the stitch to try and straighten it out or wiggle it back into place..jpg)
.jpg) Remember not every stitch will be perfect! Not every leaf in nature is perfect either! So think of any less than perfect leaves as creating interest and texture. If a stitch is really bad or pulled too much that you can't fix it don't worry! Just make another ribbon stitch right over the top! No one will know and it will look just as pretty. In fact you might like the look of a "padded" ribbon stitch and do it on purpose!
Remember not every stitch will be perfect! Not every leaf in nature is perfect either! So think of any less than perfect leaves as creating interest and texture. If a stitch is really bad or pulled too much that you can't fix it don't worry! Just make another ribbon stitch right over the top! No one will know and it will look just as pretty. In fact you might like the look of a "padded" ribbon stitch and do it on purpose!I also use this same method for creating flowers just work ribbon stitches in the shape of a flower and add a knot or bead to the middle.
.jpg)
.jpg)
.jpg)
No comments:
Post a Comment