Tuesday, December 12, 2006

My Brother Isaac's Gift

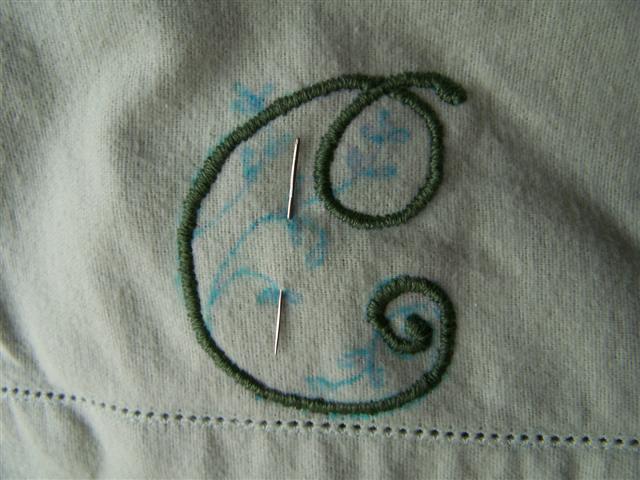
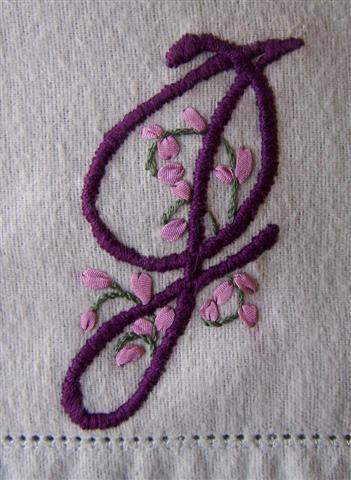
This monogram is a last minute one, since my brother Isaac will be at Dad's for Christmas I figured I better not leave him out! So I picked this monogram since he loves medieval style, out of the Victorian Alphabets, Monograms and Names for Needleworkers from Godey's Lady's Book and Peterson's Magazine. I scanned it, resized it, printed it, and then traced onto the pillowcase with a water erasable pen. Then I tried a new stitch! The split stitch, I had watched a tutorial on how to do the split stitch here, and felt that it would be the perfect stitch to get this monogram done so I can send the gifts off to Dad's. I used 2 strands blue DMC floss. I was going to do the stab method but after 2 or 3 stitches it was just too slow so I switched to the sewing method and I really enjoyed it since it seemed faster and I could get on a roll with it. I stitched each section by first stitching the outline and then stitching round and round working in towards the center until it was all filled up. I finished stitching the monogram in 2 and a half hours! I just sat and focused on it since I wanted to complete it last night. The split stitch also gives a unique texture and look to the monogram.

I had been wondering if this was an 'I' or a 'J' since the older monograms have one of those missing. Either would have been fine since they are both his monograms but I found this today that has the full alphabet and I now know that it is an 'I'! Whew!

Monday, December 11, 2006

Johnson "J" Towel Gift Set

Finished! My Johnson 'J' set for my Dad and Joyce Hope is finally complete and ready to send.
Click Here to see how I made the smaller ones.
Click Here to see the 6 inch monogram.
Click Here to see their bright bathroom the set was made for!

Sunday, December 10, 2006

Christmas Gifts

I worked on my Christmas gift for my Dad and his wife, Joyce Hope. They love bright colors so I had the idea to create a set of hand towels that I knew they both would love with the Johnson 'J' on them. Click Here to see their bathroom! I started in July, but that 6 inch floral 'J' was so much work and the terrycloth so hard to stitch on, there was just no way I was going to do 3 more! So I came up with the genius idea to make the other 3 smaller letters on the band area so I drew up a few ideas for J's and this is what I settled on. (I had been doodling in my visual journal with J's just the other day so this one was already in there and I just ran with it for this idea) I took the air-erasable pen and drew the 'J' and then stem stitched it on. I'm going to do 3 five petaled french knot flowers on each 'J' with some ribbon stitch leaves tucked in with them and 3 on the end of the 'J'. This way it won't take me near as long to finish, and it's a wonderful matching set.

In The Garden RR: Lillian's block

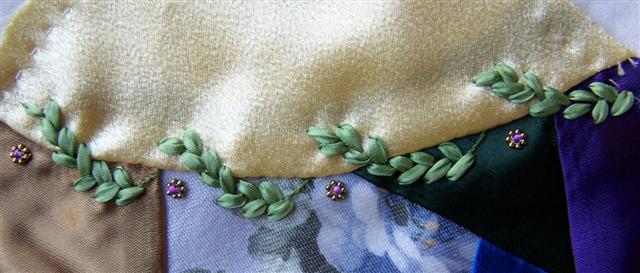
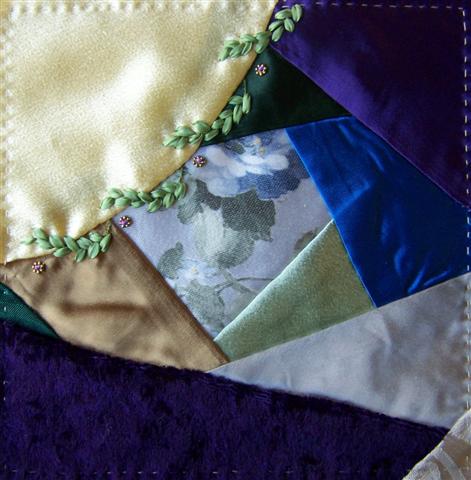
Well I was finishing up my work on Lillian's block and planning on sending it on on Monday, when I ran into a little problem...I ran out of the ribbon!!! The color I was using for the leaves was all used up, so I got on-line and ordered some more from Thread Art. Now it's not like this was a tiny bit of ribbon that I didn't pre-plan for or anything. If you have bought the spools of ribbon from Thread Art before you know that they are 10 meter spools...and I opened it new when I started working on her block! I also used some on Kari's block though, and I used it in the other motif on Lillian's block as well. I thought I had enough or I would have ordered more last week! I'm so sorry Lillian for holding up your block until the ribbon arrives.

Thursday, December 07, 2006

Windsong Jewels: My work on Kari's Block

Well I've been working and working, stitching and beading, and here is the finished block! I hope it is not too cluttered! Really this is the first CQ block that I've completed embellishing! Just click on any of the photos to see them closer.

All the larger roses are spider-web roses, and the smaller filler roses are running stitch roses, which I zigzagged from edge to edge while doing the running stitch down the ribbon.
Then I used french knot flowers for filling and the little buds are twisted chain stitch. All the leaves are ribbon stitch, except the branches on the curved seam which are padded straight stitches.

The gold seam is an alternating buttonhole stitch with lazy daisy's on both sides and a gold seed bead at the tips.

The purple seam is french knots using silk chenille to make the fuzzy dots and lazy daisy's in sets of 3 with seed beads in the middles.

Monday, December 04, 2006

Monogrammed 'C'

Here is the finished monogrammed pillowcase for my dear friend Christina who is in Iraq. It's a nice green flannel pillowcase.
For the verse I took an air-erasable pen and drew it out and then stitched over it with the stem stitch.
The verse is Psalm 4:8 says
"I will lie down and sleep in peace for you alone, O LORD, make me dwell in safety."

Sunday, December 03, 2006

Windsong Jewels: My work on Kari's Block

Here's some more work on Kari's block! I hand dyed the lace motif in antique gold and added a glitz button and glass leaf beads to the middle. Also I added some amber glass seed beads to the spokes. My goal was to make a focal point so than in the yellow area I can create an opposite focal motif in silk ribbon embroidery. I'm still going to add some seam treatments and I know it's a little out of order but hey this is CQ after all and there really aren't any rules! Heeheehee!
I also added blue running stitch roses in 4mm and ribbon stitch leaves in 2mm silk ribbon.

Floral Motif


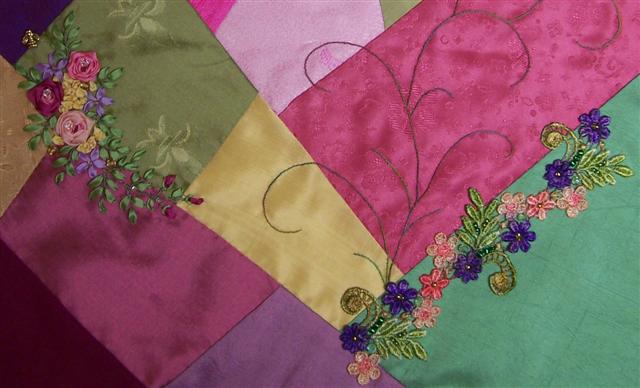
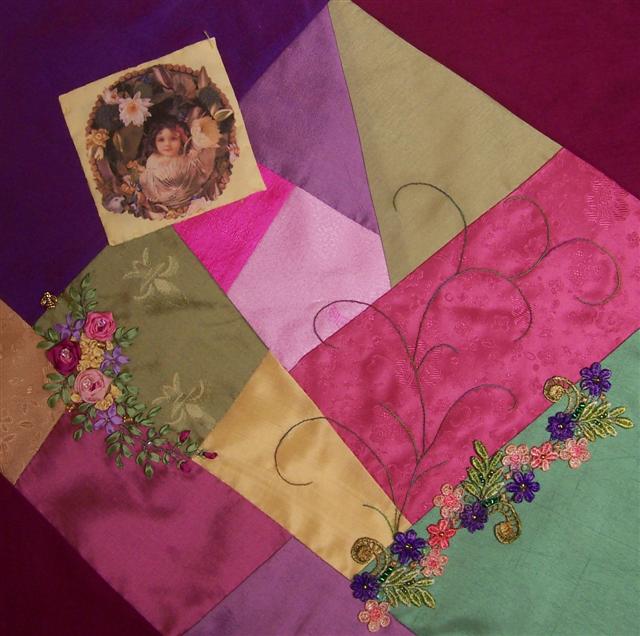
Here is a close up of the floral motif I created on Lillian's block.
I just love how it turned out. It has spider web roses in 3 different colors of 4mm silk ribbon. Clematis flowers made out of ribbon stitches in purple 4mm silk ribbon. Little yellow french knot flowers which are made by making a french knot with 1 wrap and loosely tightening with 3 wrap french knots in 1 strand DMC floss for the center. I made stems using the stem stitch and 1 strand silk floss and added leaves with 4mm silk ribbon in ribbon stitches. The little rosebuds are made from the twisted chain stitch in 4mm with a fly stitch in 4mm green worked around them.
I added clear swarski crystals to the roses as dew. Also I added amber glass seed beads to the middle of the clematis flowers. Then I added some larger amber beads and some small clear AB seed beads as dew drops near the rosebuds.

I took the air-erasable pen and kind of put circles where I thought roses would look nice then I drew little ovals to point towards the other area of the block which became the rose buds. Then I kinda felt where the clematis flowers would go and drew that in. I liked what I saw so I got some floss and made the spokes for the roses, but then I was on a role and went ahead and made the roses. Then I took a chance and instead of making the lazy daisy flowers I tried doing the ribbon stitch and ended up with clematis flowers which I like way better than the old daisy flowers. Then the next day I looked though JBM's floral stitches book and found the french knot flower and made those, I tried to make them a little looser and free so they'd look like a filler flower more. Then I drew in where the stem would go and the smaller stems I wanted to get them pointing in good directions and proportionate to the bouquet. Then when I felt it was right I stitched those in then added the leaves but I realized I needed more stems on the big long stem in order for it too be more realistic for roses so I drew in what I thought would look nice, stitched it and added the leaves. Then I added the little buds and the fly stitches on them. Then I went though what beads I thought would look nice, did a lot of bead tryouts before deciding which ones to use and where. Then I stitched them down and it was done!

My secret to making motifs is to get the foundational elements in and the filling stuff just comes together after that. To me the main flowers, and stems are foundations then secondary flowers after that, then I add the filler flowers and leaves in around them.

Friday, December 01, 2006

In The Garden RR: Lillian's block

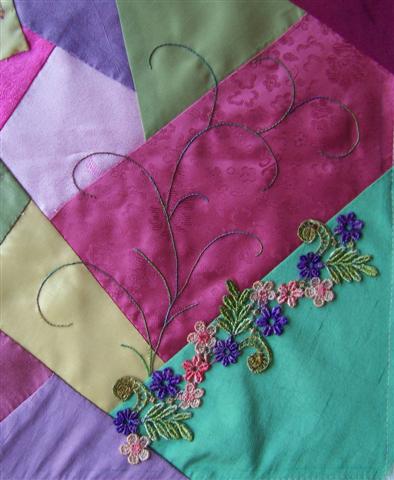
Last night and this afternoon I worked on adding some beads to the painted lace and then on a new motif that would help bring balance to the block. I also added beads to the SRE motif. I still haven't put the leaves on the vine yet but it is so easy to do that I figured I'd better go with my idea for the SRE motif before I forgot. I love how it turned out! It's like I followed a pattern but I didn't! I'm so proud of it! I even tried 2 new stitches (flowers) on it too. The french knot flower, which is the little yellow ones, and the twisted chain stitch as some rose buds! I love those little twisted chain stitch rose buds and I am thinking of using them for my next "A rose by any other name" challenge. They really make the perfect little bud and I am very impressed with them. I learned them in Sharon's Encrusted CQ online class. They are very easy too.
The motif has roses and purple clematis and it's like a wonderful bouquet right out of my garden! I think I want to make something similar on a jacket collar!
Click on the photos to see closer.

Thursday, November 30, 2006

In The Garden RR: Lillian's block and Lace Painting

Last night I worked on Lillian's block. I'm creating a nice vining motif and I also painted some lace. I had a hard time with the lace painting since I've only hand dyed ribbon and have never done the painting style. At first I didn't even use a brush but then I went and looked up a tutorial and went back and tried again. I still didn't like the results so I went to try and subdue it with an over dye of antique gold but that just took out the dye that was there, which was a good thing since I didn't like it anyway! LOL So I got to start over with it and paint very carefully so that the dye wouldn't run and this is the final results. I like it now. All my attempts took me hours though! LOL Here is a list of tips I had to learn the hard way!

Tips for first time lace painters:
  1. Use a brush (with a nice fine tip)
  2. Less is more, you can always go back and touch up if it's too little. Too much dye will start to seep and run into other areas.
  3. It's better if your lace isn't sopping wet, squeeze it out between a towel so that it's just damp.
  4. Dainty little taps work well to control where your dye is going, tap more in the middle when the brush is fully loaded.

Wednesday, November 29, 2006

Windsong Jewels: My work on Kari's Block

Here is what I worked on last night. This seam isn't finished yet. I'm planning on adding some running stitch roses with some leaves to the points of the scallops. I worked the chain stitch in scallops along the seam in a variegated hand dyed sewing thread I had bought at Joggles.com, then I added these interesting amber glass beads. I guesstimated with the scallops because I couldn't mark on the velvet and I didn't want to risk the chalky kind not coming out good. So they are a little crooked but not so noticeable that it's a bad thing...just a mark of it being hand done! Adds character!
Hey you all see that little tiny seam of silver fabric down in the right hand corner? I was wondering what I should do with it, if anything. What would you do? Leave it? Any idea's? I fiddled with putting a button or something but it all just looks weird so I'm thinking of leaving it alone and letting it just be.

Work In Progress

I finished the satin stitch the other night all I have left is the little embellishing design to fill in. I need to finish and send by 4 Dec. to get to Christina in Iraq by Christmas. Think I'm going to make it??? Depends on if I spend my time wisely! LOL

Sunday, November 26, 2006

Windsong Jewels: My work on Kari's Block

Last night I worked one of Kari's blocks that I picked to embellish for our DYB RR (Do Your Block). I added some little branches using 4mm silk ribbon padded straight stitches. Also some little round spacers with a seed bead in the middle for little flowers. I have to admit this is one of the first RR's I've done and I am so scared to mess up her block! I'm just glad I've been taking Sharon B's Encrusted CQ online class! I didn't think I would get nervous or scared but now that I have the first block in hand I'm totally worried! LOL I'm going to take it one step at a time...do some more seam treatments, and think about some motifs to embroider. My hubby keeps telling me, just do what you like and what you think looks good because that's the whole point of doing a RR, to have other's work on your blocks. So with that in mind, I'm trying to relax, have fun and embellish how I think it would look nice!

What I'm Working On

Here are some monogrammed pillowcases I'm making for Christmas presents for friends and family.

The purple J is on a green fleece pillowcase for my sister Joyce.

The green G is on a pink fleece pillowcase for my Mother-In-Law Gloria.

The green C is still in progress and it will be for my friend Christina.

The finished ones were done one each on the airplane rides to and from visiting family. Each took about 4 to 4 and a half hours to complete, and they are about 3 inches tall. The little flowers are 4mm silk ribbon done with padded straight stitches.

Wednesday, November 22, 2006

A heart my hubby made!

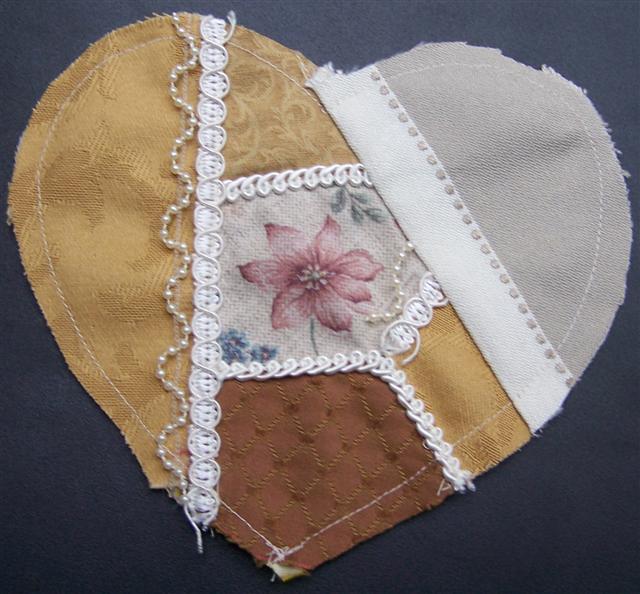
Hi all! While on my trip my hubby made me this CQ heart as a surprise! Isn't it great!?! He got some fabrics at WalMart's remnant bin and wanted to try making a heart for me. I think it is very good for his first ever CQ heart! He said he made it so I could embellish it!

Monday, November 13, 2006

On Vacation

Hi everyone! I'm going to be on vacation visiting family this week. So I won't be posting, until I return. I'm taking embroidery projects to work on so when I come back home you all can see what I worked on.

Saturday, November 11, 2006

White on White CQ Block

Last night I worked on my block for the Encrusted CQ class. I added more vines and also straight stitches over the braid. I also added a fuzzy yarn laced in the lace, and I added a tiny bit of satin stitching to to top left lace. I'm thinking of adding some sort of flower to the middle of the holes. I'm not sure but I'm thinking a beaded flower or pretty beads, but we are not to the beading lesson yet so I'm still holding out! Watch out because when beadin' time comes they are gonna be all over this block!

Friday, November 10, 2006

In The Garden RR

Here is my block for our "In The Garden" RR over at Crazy Quilting Sisters. Our RR is inspired from the hymn "In The Garden". I have never heard this hymn but the words were found and I really love the second verse, which this block matches! Here is the words to the second verse:

"He speaks and the sound of His voice
Is so sweet the birds hush their singing
And the melody that He gave to me
Within my heart is ringing"

Thursday, November 09, 2006

White on White Motif and Seam

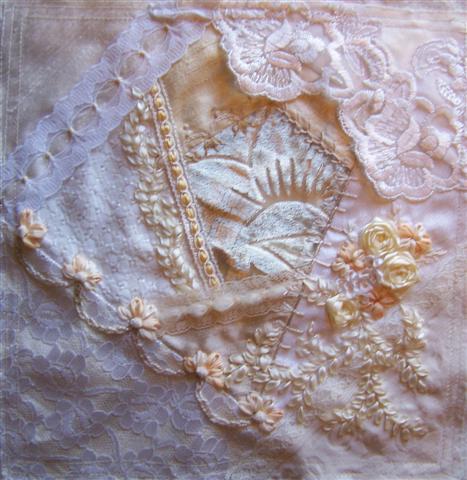
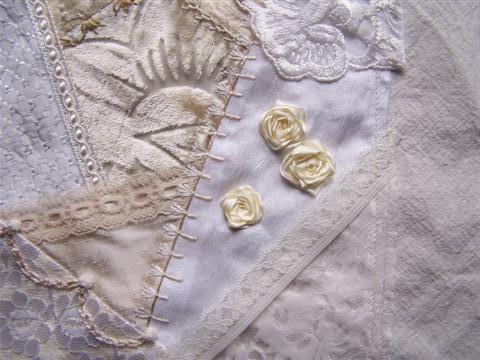
Today I worked on my block some more and finished the motif (for now, beads come later). Sharon B. suggested in her Encrusted CQ class that I just marry the colors into the block so that's what I did. I added the leaves in an in-between ivory color and then I added lazy daisy petals using the same 7mm variegated cream silk ribbon to the seam treatment.
I just love vining leaves! I'm trying to think of another way to add some more vining leaves in the upper left. I also need some suggestions on how to treat that lace in the upper left as well! I had originally thought I would lace it with ribbon but I tried to see how it would look and the gaps are just too big (using 7mm) and it looks weird!

Wednesday, November 08, 2006

White on White Motif

Last night I worked more on my motif for the Encrusted CQ class. I love how it's turning out except the color! I was using very light ivory and cream ribbon but on the block it looks yellow and orange. I don't want to tear it out because it's pretty but I just don't like the color.
The vine on the bottom is going to have leaves all over it. I'm thinking of doing white leaves or ivory/cream. Not sure which would look best.

Tuesday, November 07, 2006

15 minutes of stitching

Today I finally sat down and did my 15 minutes of stitching and started on my motif for the Encrusted CQ class on my white on white block.
I got 3 spider web roses done!

Saturday, November 04, 2006

A rose by any other name...

For the rose challenge this week, I choose the spider-web rose. I know it's a tried and true favorite, but I wanted to test out some different ideas with it.

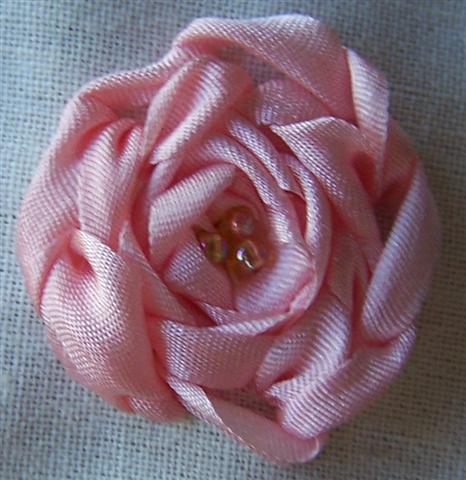
The first is a Large rose, I put a ruler in so you can see the size of it. First I wove a 4mm solid silk ribbon and then I wove 7mm variegated silk ribbon around that. Being that it was so large it needed to be tacked down so it wouldn't pull out. I'd also suggest trying a 7 spokes wheel instead of 5 as well. Then I added yellow french knots and beads to the center.

The next rose, I wove a normal spider-web rose in 4mm, but after I took 7mm and worked the chain stitch all the way around it. Then I added beads to the middle. I think it makes a nice plump ruffly rose.

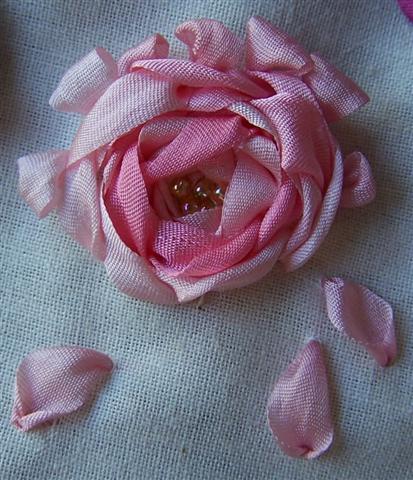
Then with the next rose I wove 4mm part way then 7mm the rest. Then I took 7mm and worked the chain stitch three quarters around, then I added loops. I added beads to the middle and to top it off I made a few loose ribbon stitch petals that have fallen from the rose in 7mm.


The next to last rose I used an awl and poked a hole in the middle of the wheel and added a tiny folded center, then I wove 7mm around that.


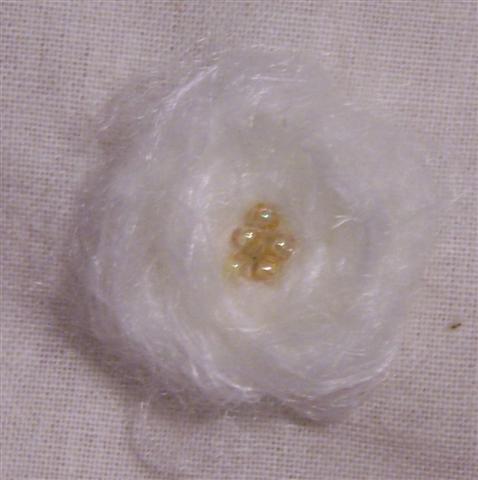
The last rose, I just added since I got the idea from Eve, over at the Hand Embroidery Group. I used a fuzzy yarn with gold seed beads. It looks kind of Christmas-ish, also kind of looks like a birds nest! LOL

Thursday, November 02, 2006

Another seam treatment: more added

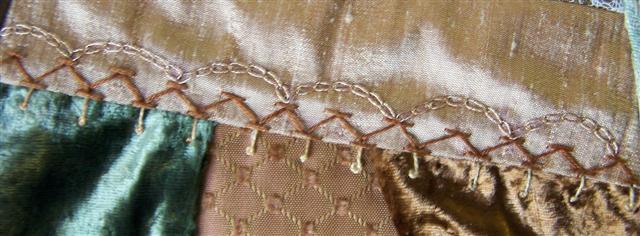
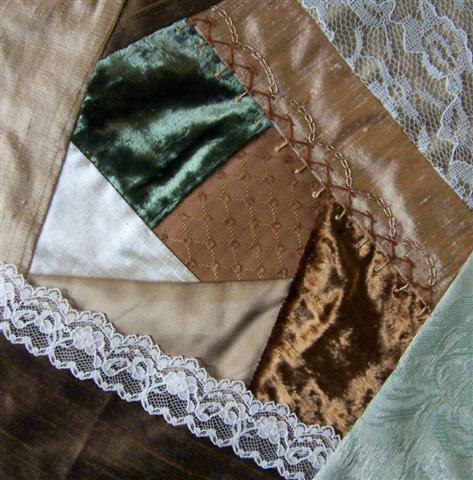
Here is more embellishment on the seam! I added a scalloping chain stitch skipping every other one and on the opposite side is the pistol stitch. I tried adding some ribbon stitches around the pistol stitch but it kept not looking right. I don't know what I'm going to do! I may just wait and see about adding beads around it to look like a daisy instead. I think I'm going to go ahead and work on another seam now.

Another seam treatment

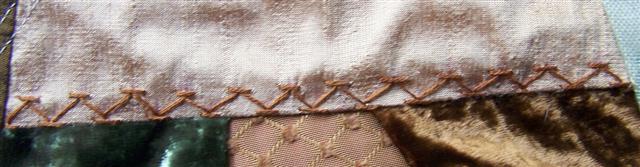
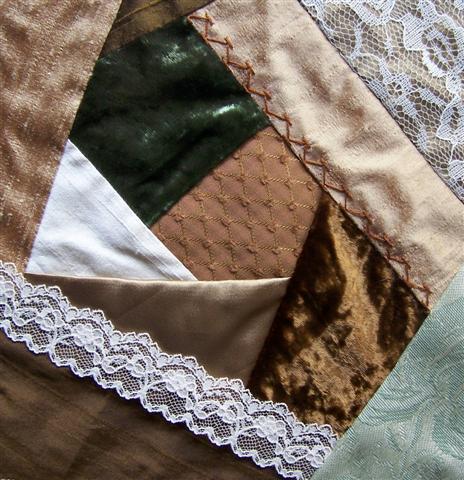
Last night I worked on this block. I originally wanted this seam to have curving chain stitching, I even used a scrapbook template, but I used an air-erasable pen and the line kept fading too soon on me! I kept having to do the frog stitch (rip it, rip it) and even then it came out crooked! Then I tried whipping it with a fuzzy silk chenille, that was nice but it was still crooked and then it looked more straight instead of nice and curvy! So I ripped it all out, remarked for a Chevron stitch and did that instead. It's not absolutely even but at least it's livable and I like it! So now I need to figure out some more stitches to add to this Chevron stitch. Humm...looking at it here maybe I can do a scalloping chain stitch hopping from one Chevron to the next. I might do another row of chevrons on the other side of the seam too.