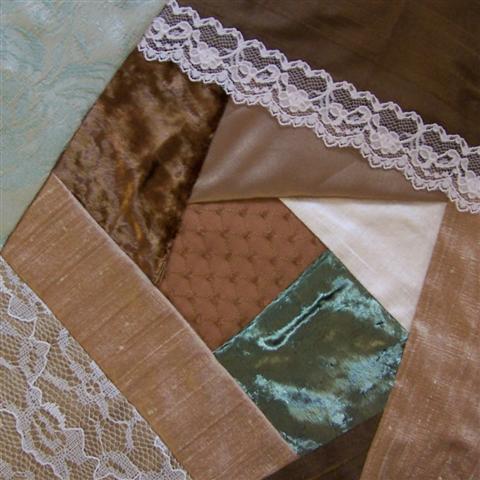
 Here is a better photo of what the block for the Encrusted CQ class looks like. I just took this photo, the velvets look better than in the scan I had taken. I also just finished some foundations for more blocks. I made two more 8 inchers, six 6 inchers, and three 7 inchers! That way they are just waiting to be made into blocks.
I have a question, are you supposed to add a seam allowance to the square? Like for a 6 inch block would you make a 61/4 in square and piece it to that size and then sew around the edge to 6 inch? Or do you just make 6 inch, 6 inches and add extra fabric around? OR do they really shrink and a 6 inch block is really a 5 something inch finished block.
3 comments:
I've missed reading your posts on the hand-emb list! Your blog is great and I think you cq is outstanding! bless ya lots and lots!
Linda C
I have made my seam allowance on CQ blocks bigger than 1/4 inch - more like 1/2 to 1 inch and put a basting line just outside the final size of the block so I know how far to embellish..don't know if this is how other CQers do it, but it works for me. I would rather have a bit too much in the seam allowance and have to trim it than have too little and be mad at myself!
Nice block by the way...looks like it has lots of texture. Have fun with the class!
Hi, Melissa,
When you're making the block you want to add about an inch all the way around to allow for shrinkage from the stitching and for your seam allowance. When you do rr's you want to have a baste line running the entire block determining where the stitchers are to stop stitching so you'll be able to stitch it together. The outside edges need to be zig zagged or somehow "contained" to prevent the fabrics from shredding. (Learned all this the hard way!) LOL!!! Hope it helps!!! Hugs...Leslie
Post a Comment